Using MindGenius Online
In light of some of the recent changes we’ve made to using MindGenius Online, this blog is dedicated to showing you 3 great ways you can spruce up your projects and bring them to life using our Styles feature inside branch properties.
Adding style and colour to your mindmaps help keep your information engaging, entertaining and eye-catching. If you love to keep your work as entertaining as possible, the 3 features we’ve introduced over the past year will without a doubt help you keep your team engaged with the project while also giving it a sense of fun.
Applying shapes and colour
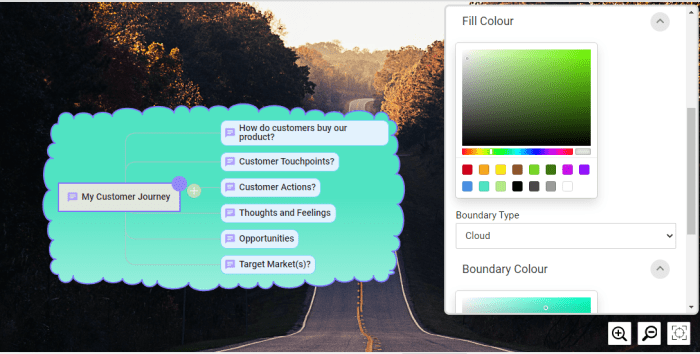
Introduced on the 25th August, you can now edit the branches of your mindmap and change its colour. We’ve provided you with a list of 5 options to choose from (Cloud, Polygon, Ellipse, Curve and Box) to make your information exciting and engaging to work with.
Not only can you add a different style of branch, but you can also change its colour. For many, it can sometimes be difficult to work with colours that don’t match your background, or maybe you want to work under your company’s colours to keep your work consistent. The good news is, you can select your branch to be ANY colour by selecting it from the colour chart that can be found in Branch Properties (as shown below).

Making your project stand out by adding different shapes and colours to your mindmap is one of the best ways to keep your team engaged with the project and prevent it from becoming stale and boring.
Adding a custom background
Our partnership with image providers Unsplash lets you choose from a huge selection of images to let you add a custom background to your mindmap. Sometimes the plain white screen that you start out with can make your project look bland.
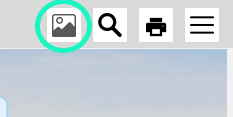
Adding a custom background is simple to do, we have an image icon located directly on the mindmap (as shown below). From there, simply enter some keywords to find the image you’re looking for and select from the Unsplash database.

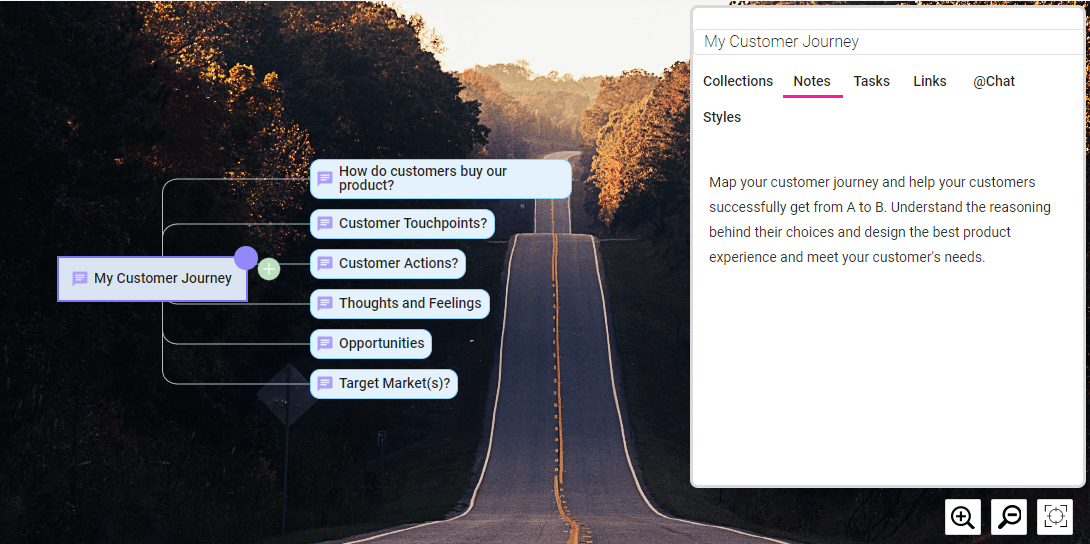
Adding a backdrop to your mindmap using MindGenius Online makes your information stand out and gives your mindmap a bit of life. Once you’ve added your custom background, your mindmap will look something like our Customer Journey project (as shown below) where the background is engaging and relating to the project you’re doing. However, that’s not to say you can’t simply choose a bacgkround because the view is good or the image is eyecatching. As I said, you can choose ANY image you want.

Adding images to branches
If you’re like me, a visual learner, then you’ll absolutely love adding images on everything you do. MindGenius Online gives you the freedom to add your very own images to the branches you create. While adding images is a great way to keep your projects engaging, it can also be a useful way to store project information. For example, if you were working on a website design, you might want to upload some images of your competitor’s websites, or some screenshots of some layouts that you’ve found that you want to try.
To add an image to a branch, you can go to the branch settings using the purple circle (as shown below).

From there, select the image icon and you can upload an image from there. You can also upload an image using Branch Properties > Styles > Upload Image. Once you’ve uploaded your image to your chosen branch, it will look something like this:
![]()
Conclusion – Using MindGenius Online
Making your mindmaps using MindGenius Online has never been easier. Now you can bring your information to life in more ways than ever before. Hopefully, through these 3 tips your projects will be as energetic, engaging and as entertaining as possible.
If you’re reading this for the first time and wish to try using MindGenius Online, you can do so for absolutely no cost. Simply get started for free here.
Making mindmaps are easy with MindGenius Online. Get started today for FREE.
